
TL;DR:
This post introduces basic network commands and tools you can use to configure and troubleshoot your network in a Linux environment. You will learn how to use ifconfig, ip, netstat, ping, traceroute, and nslookup.
Understanding Basic Network Commands
1. ifconfig
ifconfig (interface configurator) is a traditional command-line tool used to configure, control, and query TCP/IP network interface parameters from a Linux operating system.
Example of usage:
Ifconfig
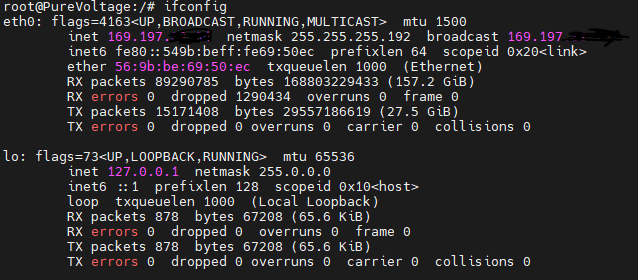
This command displays information about all network interfaces currently in operation.
2. ip
ip is a versatile command that replaced the deprecated ifconfig. It is used for several network-related tasks like viewing network configuration, setting up IP addresses, setting up route tables, etc.
Example of usage:
ip addr show
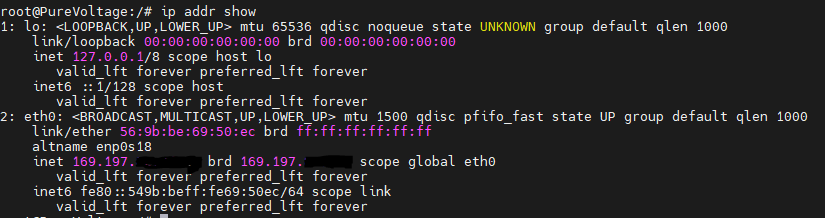
This command displays details of all active network interfaces.
3. netstat
netstat (network statistics) is a command-line tool that provides information about network connections, routing tables, and network interface statistics.
Example of usage:
netstat
This command shows a list of network connections, routing tables, and a number of network interface and network protocol statistics.
Troubleshooting Your Network
1. ping
ping is the most common tool for troubleshooting the network. It sends an ICMP echo request to a specific network host to check whether the host is reachable.
Example of usage:
ping google.com
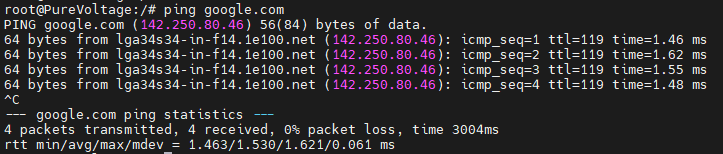
This command will keep sending packets to google.com until you stop it (Ctrl+C).
2. traceroute
traceroute is a network diagnostic tool used to track the pathway taken by a packet on an IP network from source to destination.
Example of usage:
traceroute google.com

This command will show the path that packets take to reach the google.com server.
3. nslookup
nslookup (name server lookup) is a network administration command-line tool for querying the Domain Name System (DNS) to obtain domain name or IP address mapping.
Example of usage:
nslookup google.com
This command returns the server name and IP address of google.com.
Diving Deeper into Basic Network Commands
More on ifconfig
The ifconfig command is used to configure the kernel-resident network interfaces. It’s primarily used to set up the interfaces when the system is booting. You can also manually make changes to the network interfaces with this command.
Example of usage:
ifconfig eth0
This command displays details about the network interface named eth0.
If you want to configure an IP to a network interface, you can do it like this:
sudo ifconfig eth0 192.168.1.100
This command sets the IP address of the eth0 interface to 192.168.1.100.
More on ip
The ip command is used to show or manipulate routing, devices, policy routing, and tunnels. It is similar to ifconfig but more powerful.
Example of usage:
ip link show
This command displays information about all network interfaces.
You can also change the state (up or down) of a device with this command. For example:
sudo ip link set dev eth0 up
This command will bring up the interface for eth0.
sudo ip link set dev eth0 down
This command will bring down the network interface eth0. Be careful running these commands not to shut down your port unless you have remote or direct access to the system.
Introduction to mtr
mtr (My TraceRoute) is a network diagnostic tool that combines the functionality of the traceroute and ping programs in a single network diagnostic tool.
Example of usage:
mtr google.com

This command will start sending packets to google.com and display real-time stats about each hop on the route to the google.com server. It’s a great tool for identifying where packet loss is happening along a network path.
Remember, to effectively manage and troubleshoot your network in a Linux environment, it is essential to familiarize yourself with these network commands. Keep exploring and practicing with them.
Conclusion
Understanding and using these basic network commands and tools is essential when it comes to managing and troubleshooting your network in a Linux environment. Remember, practice is key. The more you use these commands, the more comfortable you’ll become with them. If you’re interested in learning more about Linux basics, make sure to check out other posts in our Linux Basics series.